

What Happens During a Roofing Project — Roof Replacement
Most homeowners have never watched a roof replacement happen from start to finish. You sign the contract, the crew shows up, and then things get loud and busy and confusing — and you’re not entirely sure what’s normal and what isn’t. Knowing the sequence in advance changes the whole experience. You stop wondering if something’s wrong when the tear-off sounds like a freight train, and you know exactly what to look for at the end to confirm the job was done properly.
Whether you’re researching roof replacement near me at Hattiesburg, roof replacement near me at Huntsville, roof replacement near me at Birmingham, or anywhere across our region, this guide walks you through every stage — from the day before the crew arrives to the final walk-through. No jargon, no guesswork — just the honest sequence of events.
The Typical Sequence of a Roof Replacement Project
FAQ: What is the typical sequence of events during a roof replacement?
A residential roof replacement follows a clear sequence: material delivery arrives first (usually the day before), then tear-off of the existing system, deck inspection and repair, underlayment installation, flashing work, new shingle or panel installation, final inspections, and cleanup. Each stage needs to be completed before the next begins, and the sequence is non-negotiable — shortcuts at any stage compromise the integrity of everything that comes after. A contractor who can explain this sequence clearly before the job starts is one who actually plans their work rather than improvising it.
Full Roof Replacement Sequence — Stage by Stage
Pre-Job Prep — Day Before
Materials delivered and staged. Homeowner prepares property — moves vehicles, protects landscaping, clears driveway. Crew lead may inspect for anything not covered in the original estimate.
Property Protection
Crew lays tarps over landscaping, AC units, and driveway. Drop cloths protect walls and windows from falling debris. Magnetic nail sweepers are staged for cleanup. This step happens before a single shingle is touched.
Tear-Off — The Loud Part
Existing shingles, underlayment, and sometimes flashing are stripped to the deck. This is the noisiest stage. Debris is fed directly into a dump trailer or loaded into staging piles for quick removal. Expect vibration through the house.
Deck Inspection and Repair
Once the deck is bare, the crew inspects every board. Soft spots, water-stained wood, rot, and delaminated OSB panels are identified and replaced. This is the stage where you may hear about additional costs — because deck damage isn’t always visible until tear-off.
Drip Edge and Underlayment
Drip edge flashing goes on first at the eaves, then underlayment (synthetic or felt) is rolled out across the full deck, overlapping correctly to shed water. Self-adhering ice-and-water shield is applied at eaves, valleys, and penetrations.
Flashing Installation
Step flashing, valley metal, pipe boot replacements, chimney flashing, and kick-out flashing at wall junctions are all installed or replaced. This is the most detail-intensive stage — it’s where a quality crew earns their money compared to a crew cutting corners.
Shingle or Panel Installation
Shingles are installed from the eaves up, with each course overlapping the one below. Nail pattern, spacing, and starter course positioning matter more than most homeowners realise — this is where wind resistance ratings either hold up or fail.
Ridge Cap and Ventilation
Ridge cap shingles are installed along the peak. Ridge vents are cut and installed if part of the ventilation plan. Proper ventilation is confirmed — a poorly ventilated attic under a new roof accelerates shingle aging dramatically in Southern climates.
Cleanup and Debris Removal
All tear-off material is removed. Magnetic nail sweepers are run across the lawn, driveway, and any areas where debris could have landed. Tarps are pulled and the site is swept. Final load of waste is hauled away.
Final Walk-Through and Sign-Off
Crew lead walks the property with you. Ridge line, flashing, pipe boots, and cleanup areas are reviewed. Written documentation — warranty paperwork, permit sign-off — is provided before final payment is made.
How Long Will the Project Take?
FAQ: How long will a typical roof replacement take?
Most standard residential roof replacements are completed in one to two days. A straightforward single-story home with a moderate pitch and no unusual complexities — no multiple chimneys, no skylights, no dormers — can often be done in a full day by an experienced crew. More complex roofs with multiple penetrations, steep pitches, or significant deck repair needs typically run two to three days. Metal roof installations take longer due to panel measurement and fit requirements, usually two to four days for a residential system. Commercial projects vary significantly by scope — a small commercial flat roof might be two days; a large multi-building replacement is a phased multi-week project. Weather is the biggest wildcard. Expect the timeline to shift by a day if rain interrupts, and know that a professional crew will not install shingles on a wet deck.
| Project Type | Typical Duration | What Extends the Timeline | What Speeds It Up |
|---|---|---|---|
| Small single-story home (under 20 sq) | 1 day | Deck repairs, steep pitch | Simple profile, good access |
| Mid-size home with chimney / skylights | 1.5 to 2 days | Flashing complexity, multiple penetrations | Experienced crew, pre-ordered materials |
| Large or multi-story home | 2 to 3 days | Roof area, dormer count, access staging | Additional crew members |
| Metal roof — residential | 2 to 4 days | Panel cutting, seam precision, custom trim | Pre-fabricated panels, experienced metal crew |
| Commercial flat roof (small) | 2 to 3 days | HVAC equipment, drain work, membrane type | Unobstructed roof, no active tenants |
| Commercial flat roof (large / multi-unit) | 1 to 3 weeks+ | Phased scheduling, permit timing, tenant coordination | Pre-project planning and staged material delivery |
Yes, It’s Going to Be Noisy — Here’s What That Means
FAQ: Will my roof replacement be noisy?
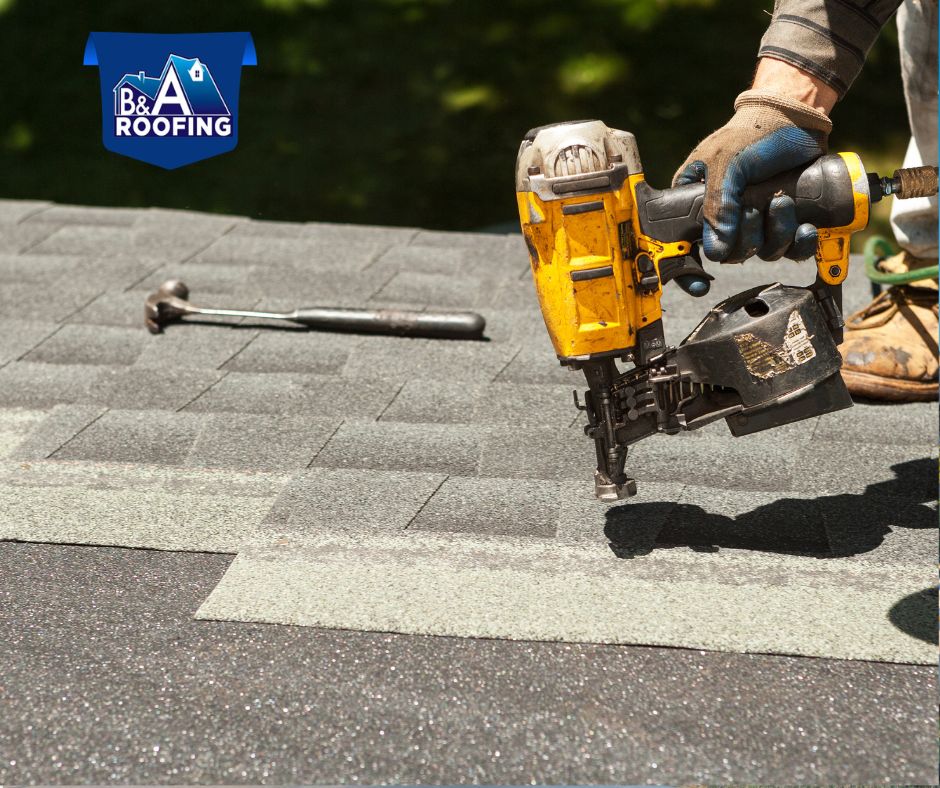
Very. Tear-off is the loudest phase — scrapers dragging across the deck, shingles landing in a dump trailer below, and the general percussion of a crew working fast across your entire roof surface. Once the new shingles go on, pneumatic nail guns fire in rapid sequences that sound like a jackhammer moved upstairs. The noise level during an active installation day is comparable to moderate construction work, concentrated directly above every room in the house. It’s not dangerous or abnormal — it’s just loud. Plan accordingly: if you work from home, schedule calls around the installation day, keep pets in a secure quiet room, and know that by the following morning it will be completely silent and finished.
Noise Level by Project Stage — What to Expect
Relative noise intensity through the day — 10 = loudest point
Noise levels are relative estimates. Actual intensity varies by roof size, crew size, and material type. Metal panel installation produces different sound characteristics than asphalt shingle work.
Do You Need to Be Home?
FAQ: Do I need to be home during the roofing project?
You don’t need to be home for the full project, but you should be available at two specific points: the start of the day and the end. Being there when the crew arrives lets you confirm the scope, point out any concerns, and review the access plan for your property. Being present at the end lets you walk through the completed work with the crew lead before signing off and making final payment. If you genuinely can’t be there for the walk-through, arrange for someone you trust to do it on your behalf — signing off on the project means you’re accepting it as complete, so you want someone with eyes on it. For the hours in between, you don’t need to be watching from the window. The crew knows what they’re doing.
Homeowner Preparation Checklist — Before the Crew Arrives
Move vehicles from the driveway and any area directly beside the house where materials may be staged or debris could fall.
Cover or move patio furniture, grills, and outdoor decorations within 15 feet of the house perimeter — shingles and nails travel farther than you’d expect.
Bring pets inside and keep them in an interior room, away from the noise and any exterior doors the crew may use.
Take fragile items off walls in upstairs rooms if you have them — vibration from tear-off and nail guns can rattle pictures and shelves.
Let your neighbours know the night before — a quick heads-up about noise and the dumpster or staging area prevents friction and is the neighbourly thing to do.
Identify your attic access point for the crew — they may need to inspect deck condition from below after tear-off.
Plan for limited internet or noise disruption if you work from home — or consider working from a coffee shop for the main installation day.
What Should Cleanup Look Like When They’re Done?
FAQ: What should the crew clean up when the project is done?
Every scrap of old shingle material, every piece of old flashing, every roll of torn underlayment — gone. The dumpster or trailer is hauled away. Magnetic nail sweepers are run across the lawn, driveway, and landscaping beds to collect stray fasteners, and this should be done systematically rather than as a quick pass. All tarps are removed and the areas they protected are swept. Gutters should be cleared of any debris that fell in during tear-off. The only thing that should be left behind is your new roof, the warranty documentation, and a property that looks as though someone cleaned it up after themselves. If you find the cleanup is incomplete at the walk-through, address it before signing off — not after. A professional crew finishes the job completely, not mostly.
| Walk-Through Item | What to Look For | Red Flag |
|---|---|---|
| Ridge line | Straight, consistent cap shingles, no gaps | Wavy or uneven ridge, exposed nail heads |
| Valleys | Clean straight line, metal visible (open valley) or tight weave (closed) | Ragged edges, sealant-only treatment |
| Chimney flashing | Step flashing visible at sides, counter flashing sealed into mortar | Only caulk visible, no metal flashing |
| Pipe boots | New rubber collars tight to pipe, sealant at collar edge | Old cracked rubber, gaps at base |
| Drip edge | Continuous metal at all eaves, overlapping correctly at corners | Gaps, missing sections, or none installed |
| Shingle coursing | Consistent exposure, straight lines, no lifting at edges | Uneven lines, corners curling, visible fishmouths |
| Lawn and driveway | No visible nails, scraps, or debris | Nails in grass, shingle pieces left near landscaping |
| Gutters | Clear of shingle granules and debris | Heavy granule buildup left from tear-off |
| Documentation | Warranty paperwork, permit sign-off, material data sheets | Verbal-only warranty, no written documentation |
What Happens If Deck Damage Is Found During Tear-Off?
This is the moment that catches most homeowners by surprise, and it doesn’t have to. Deck damage — rot, water staining, soft spots, or delaminated OSB panels — is invisible until tear-off reveals it. A reputable contractor will stop work, photograph the damage, and contact you before adding any materials or labour that weren’t in the original quote. You should expect to be notified immediately, given a clear explanation of what was found, and offered a written change order before the additional work begins.
According to building science guidance from Building Science Corporation, moisture-damaged roof decking is one of the most consequential hidden defects in a building envelope — failing to address it during a replacement and simply re-roofing over compromised decking accelerates the new roof’s failure and can create ongoing moisture problems in the structure below. It’s always worth repairing it correctly rather than covering it up.
Material-Specific Notes: What’s Different About Your Roof Type
The core sequence applies to any residential roof replacement, but material type changes certain details that are worth knowing.
| Roof Type | What’s Different in the Process | Key Homeowner Note |
|---|---|---|
| Asphalt shingle | Standard sequence — fastest installation type | Granule shedding in gutters for first few months is normal |
| Standing seam metal | Panel measurement and cutting on-site, longer install window | Ask about coating and maintenance plan upfront — see our guide on the best paint for metal roof surfaces |
| Flat / TPO / EPDM | Drainage redesign often part of scope, membrane adhesion curing time | The flat roof drainage system design should be reviewed before installation, not after |
| Impact-resistant shingle | Heavier material — same sequence, slightly more labour per square | May qualify for insurance discount — ask your insurer before the job |
Regional Context: What Roof Replacement Looks Like in Our Markets
The process is consistent, but each market has its own context — permit timelines, code requirements, and the climate pressures that make certain stages more critical than others. In humid markets like Hattiesburg, the deck inspection step is particularly important: moisture has often done more damage beneath the shingles than the surface condition suggested. For roof replacement near me at Huntsville and roof replacement near me at Birmingham, the transitional climate means crews need to plan around spring storm windows and the afternoon thunderstorm pattern that can interrupt an installation mid-day. Scheduling a realistic weather buffer into the timeline is something an experienced local contractor already builds in — a contractor who promises a completion date without any weather contingency is either optimistic or hasn’t been doing this long in the South.
For commercial projects, the planning complexity scales up significantly. Our team’s experience with commercial roof installation tupelo reflects the pre-construction coordination that commercial replacements require — permit sequencing, tenant notification, phased scheduling, and post-installation inspection that residential projects don’t carry. Reviewing current roof repair cost tupelo mississippi benchmarks helps property owners in the region budget realistically before contractor conversations begin.
Whether your project is in Mississippi, Alabama, or Georgia, the same standards apply. A reliable clarke county roofing company for Mississippi-side properties, or a trusted roofing contractor athens al property owners depend on across the state line, should be able to walk you through every stage of this process before the first truck arrives — not after questions arise mid-project.
The Bottom Line
A roof replacement is one of the largest single investments you’ll make in your home. Understanding what should happen at every stage — what’s normal, what’s worth asking about, and what should raise a flag — puts you in the best possible position to oversee the project confidently and verify the work was done correctly before you sign off.
At b & a roofing, we walk every homeowner through the full project sequence before work begins — because a homeowner who understands what’s happening is easier to work with and ends up with a better result. If you’re planning a roof replacement and want a team that communicates clearly from estimate to final walk-through, B&A Roofing is ready to start that conversation.